Click here to list
Home
Listings
Store
***THE MACHINE MUST ALWAYS BE TURNED OFF DURING SERVICE AND REPAIRS***
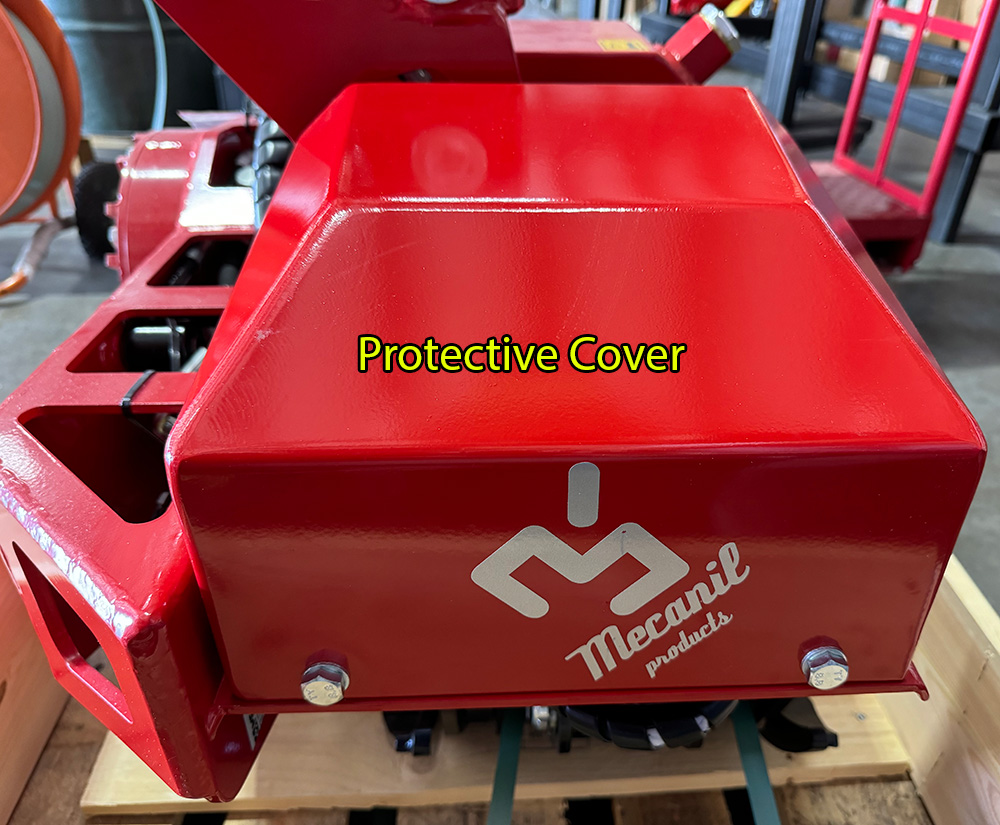
1. Remove the protective cover to expose the valve set.
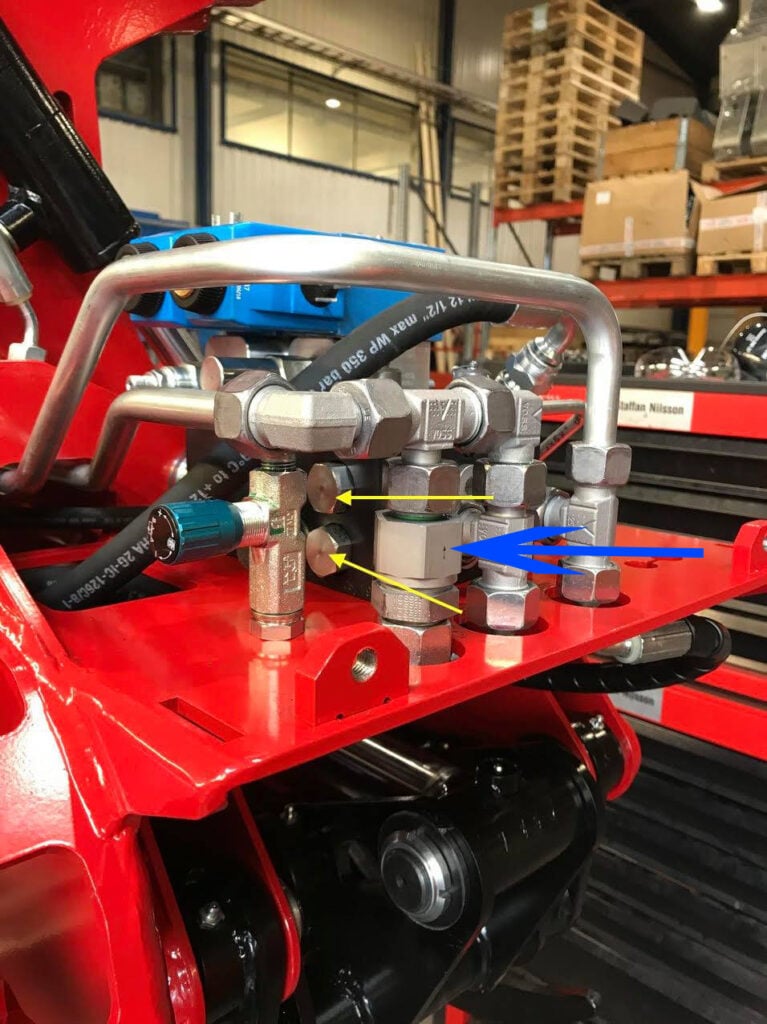
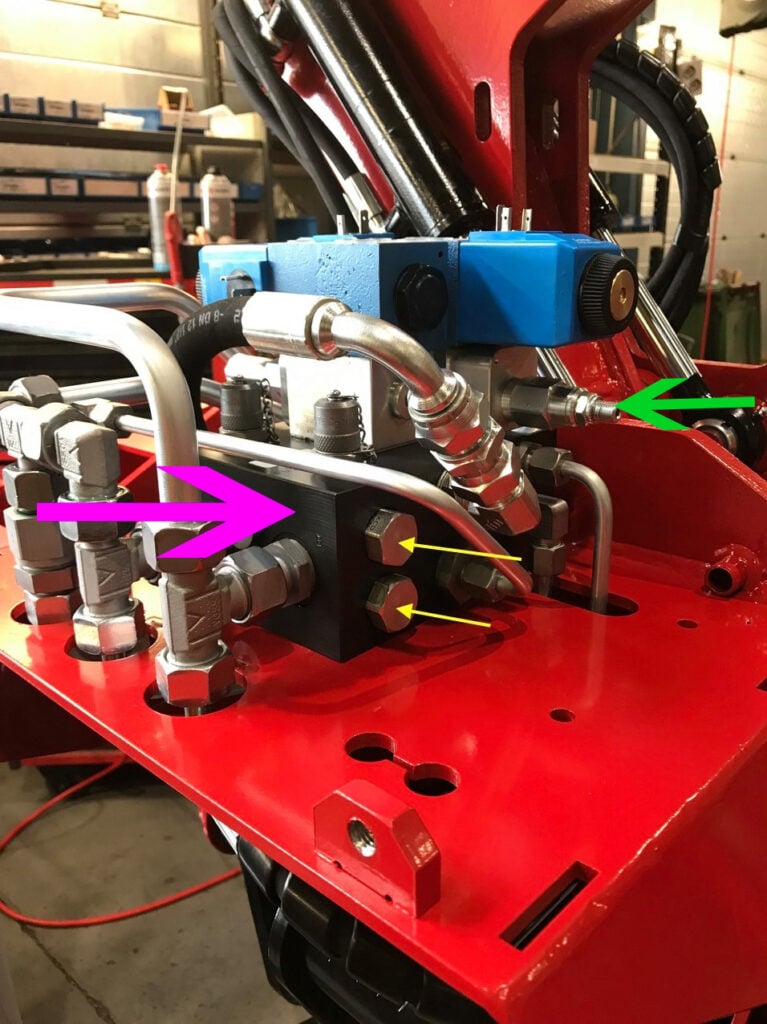
2. Locate the 4 check valves (see yellow arrows in pictures)
3. Using a 22mm wrench/socket, go back and forth to loosen the cartridges. (The upper check valves differ from the lower ones)
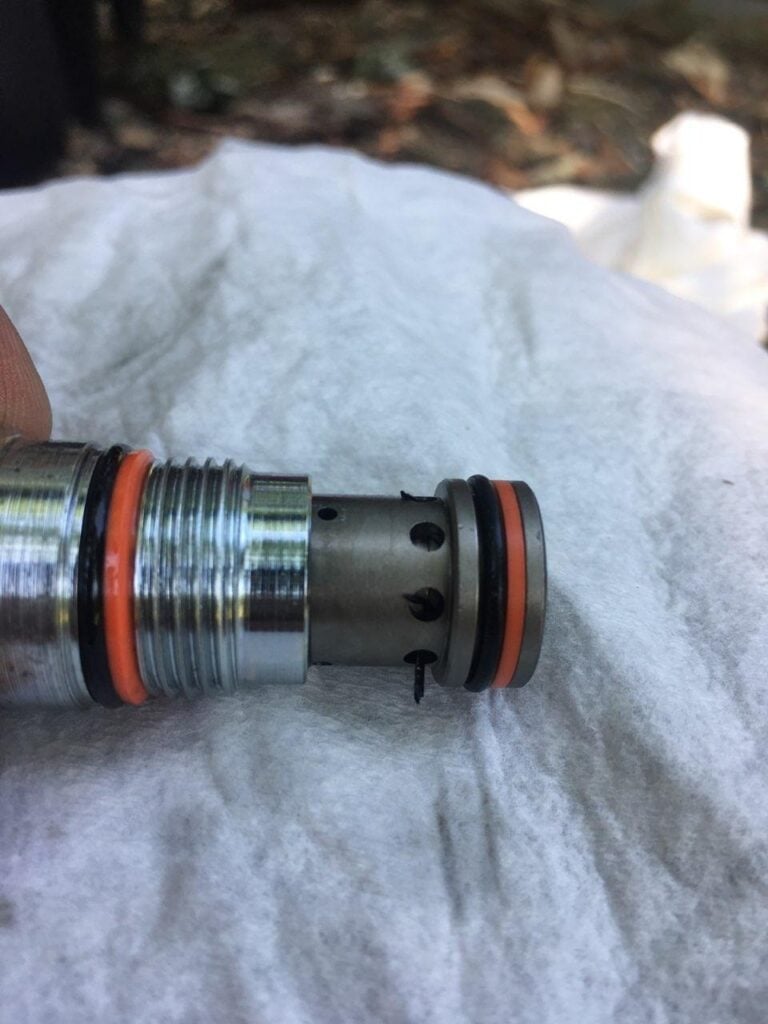
4. Remove the cartridges and check for damaged seals and debris stuck in the valves. Remove any debris.
5. If seals are damaged, install new seals. (purchase here)
6. Re-install cartridges and hand tighten with wrench/socket.