***The machine must always be turned off during service and repairs***
Removing Chain and Saw Bar
Loosen the two nuts that hold the saw bar in place (30mm wrench). Loosen the chain.
Wedge a flat head screwdriver between the bar and chain on the underside and turn the nut on the sprocket upward.
The chain should release from the sprocket, remove the chain.
Loosen the nuts for the saw bar further (if necessary) Check that the two pins from the chain tensioner are outside the saw bar and pull of the saw bar.
Installing New Saw Bar and Chain
Insert a new saw bar
Put a new chain on the saw bar and sprocket. Start by putting the chain on the top half of the saw bar and then on about half of the sprocket.
Turn the sprocket nut downward until the chain is on.
Tighten the two nuts for the saw bar. (30mm wrench)
Tension the chain
Installing Receiver Power Bridge
Pairing the Remote
Open the receiver box inside the grapplesaw (yellow lid)
Press the small red button marked “F” (LED #7 will illuminate)
Press the button marked “S” (All relay-LEDS will illuminate)
Press and hold buttons 1 & 2 on the yellow handheld remote until the LEDs on the receiver turn off.
The remote is now paired with the receiver
To clear the memory and erase all pairings, press “F” button once and press and hold “S” button for 10 seconds.
Adjusting the Bar Speed
Remove the protective cover on the grapplesaw (17mm hex)
The bar speed adjustment valve has a blue knob (see picture)
loosen set screw (2mm allen)
To Reduce the bar speed; turn the valve clockwise
To Increase the bar speed; turn the valve counter-clockwise.
After adjusting the knob, tighten the set screw.
If the saw bar is moving too fast it can cause the cut to stop. Running the bar speed too fast will also reduce the lifespan of the saw motor.
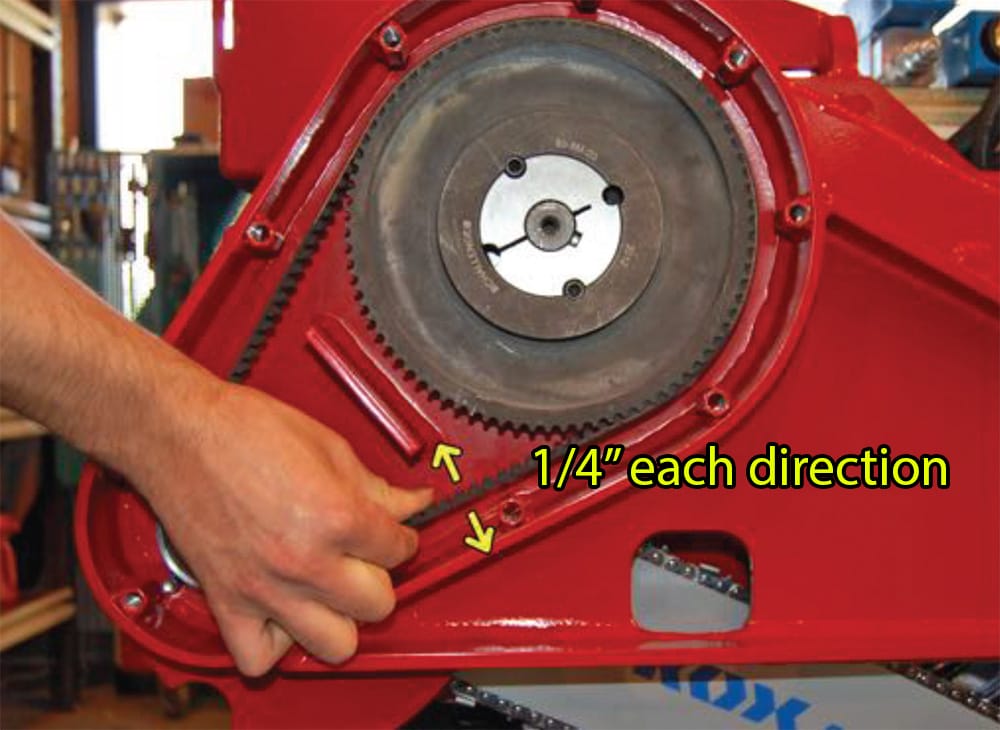
Replacing the Drive Belt (SG220/SG280)
Remove the drive belt cover. (17mm hex)
Loosen the two bolts for the saw motor (10mm allen)
Tension belt by tightening the indicated nut just inside the saw cassette
Check the tension is correct. The belt should be possible to move about 1/4″ in both directions. It should by quite firm when trying to move it.
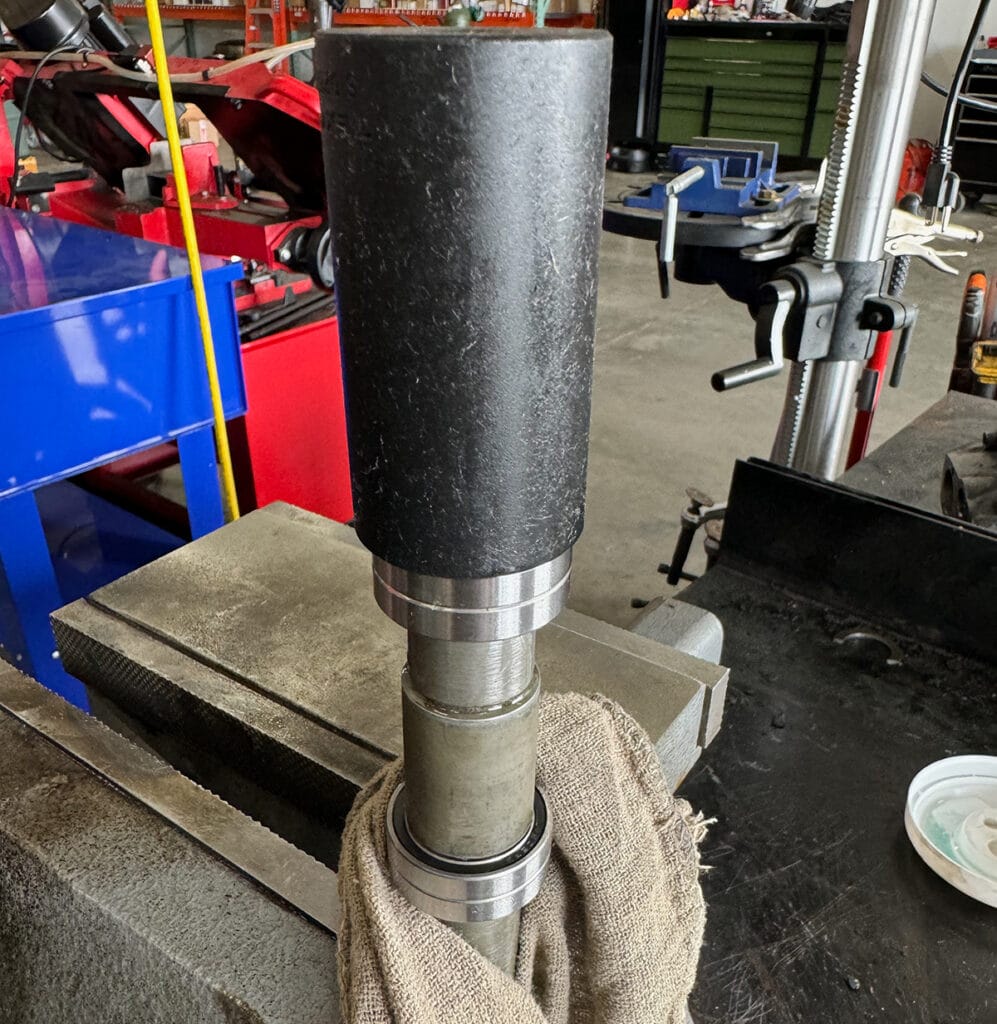
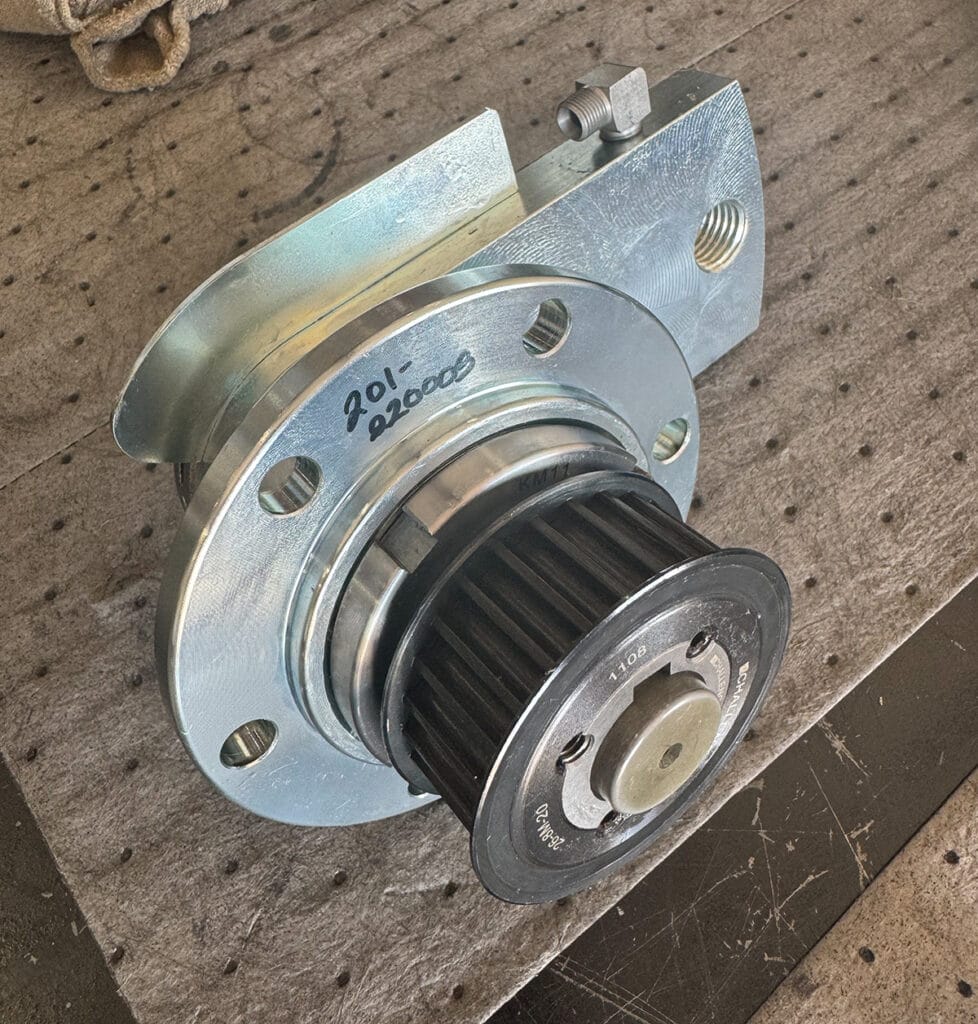
Insert the large bearing in one. Make sure the bearing is straight a possible so it doesn’t go in at an angle. Push the bearing inwards. If the bearing does not go in you may need to use a bearing/bushing driver. Repeat with the second bearing.
Flip the bearing enclosure and repeat the steps above.
Take the bearing enclosure and push it over the bar mount plate. If it doesn’t push down all the way down, flip over the bar mount plate and tap it down from the back side of the bar mount plate.
The bearing enclosure should spin freely.
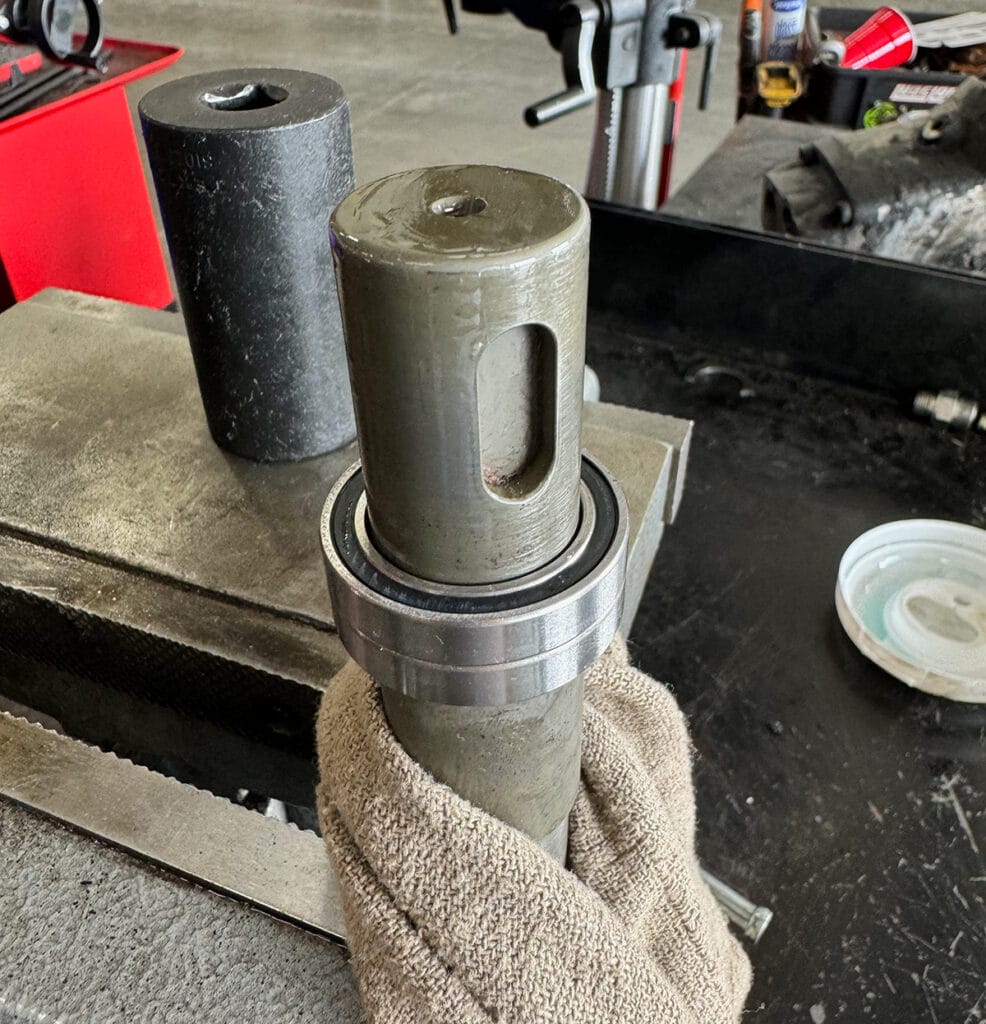
Insert the saw shaft in to the bearing enclosure. You may need to gently tap the shaft to get it all the way in.
Install the retaining ring
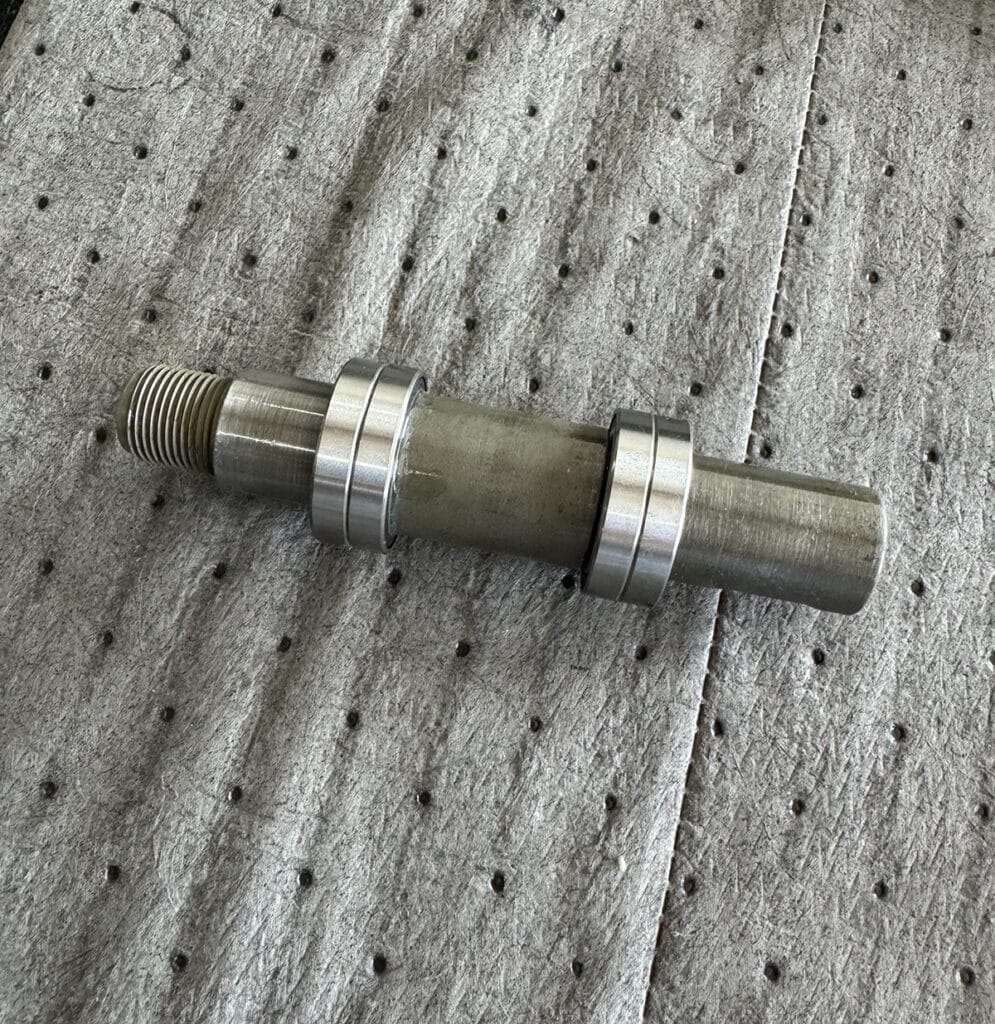
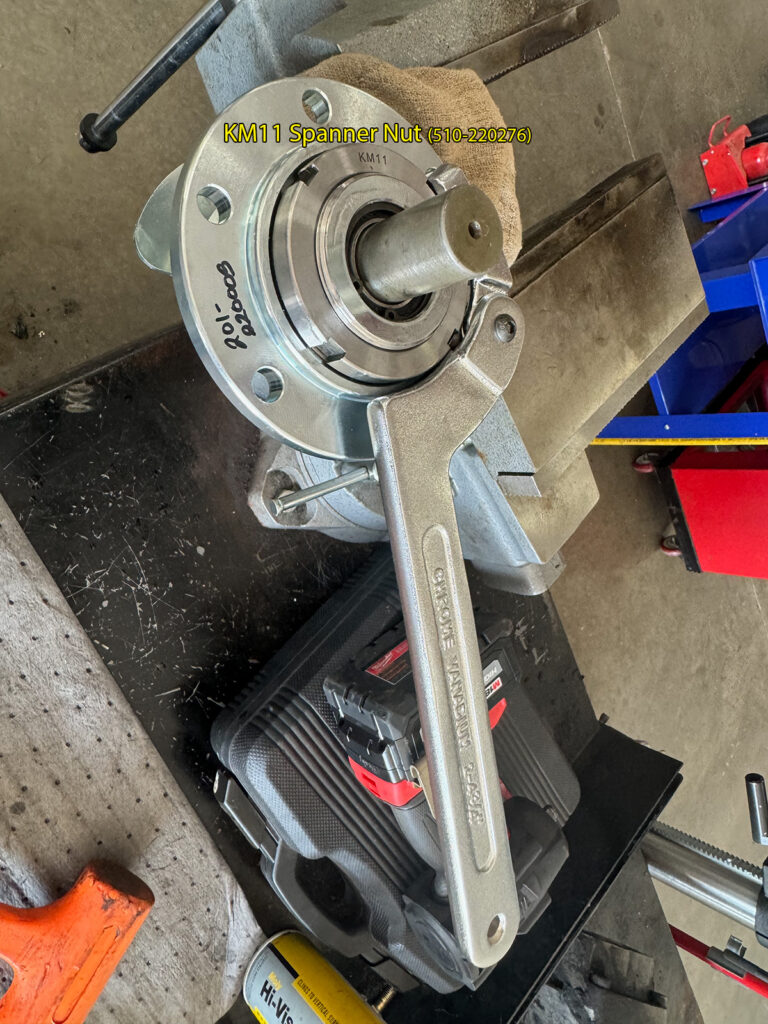
Thread on KM11 spanner nut and tighten. *the tapered side of the KM11 nut must face in towards the bearings.
Place distance washer over shaft *note tapered side goes down
Put small key in to shaft.
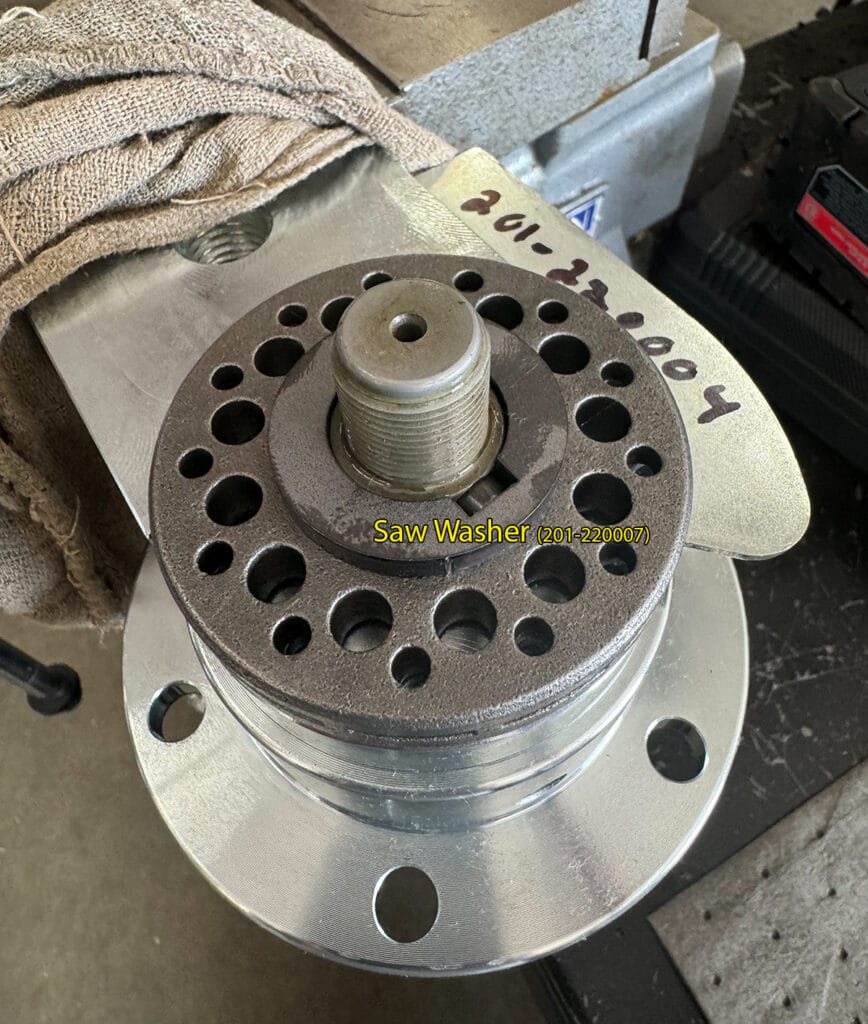
Place chain sprocket over shaft and Line up with small key.
Place saw washer over shaft and line up with small key.
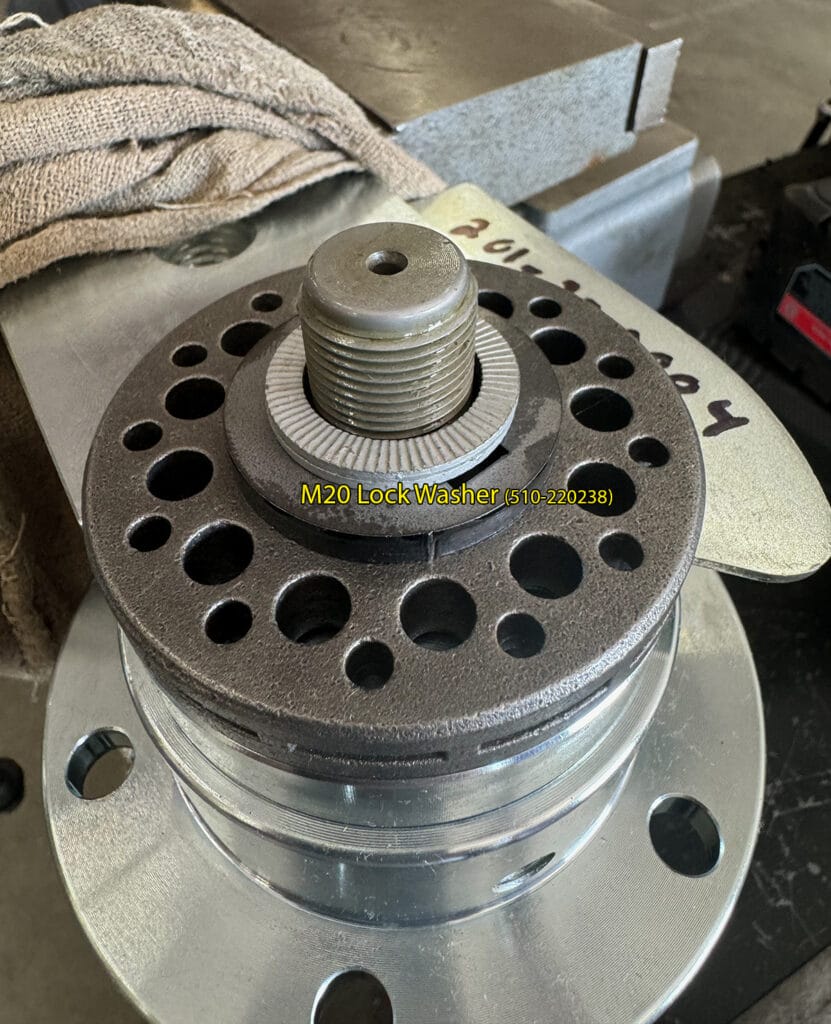
Place M20 lock washer over shaft.
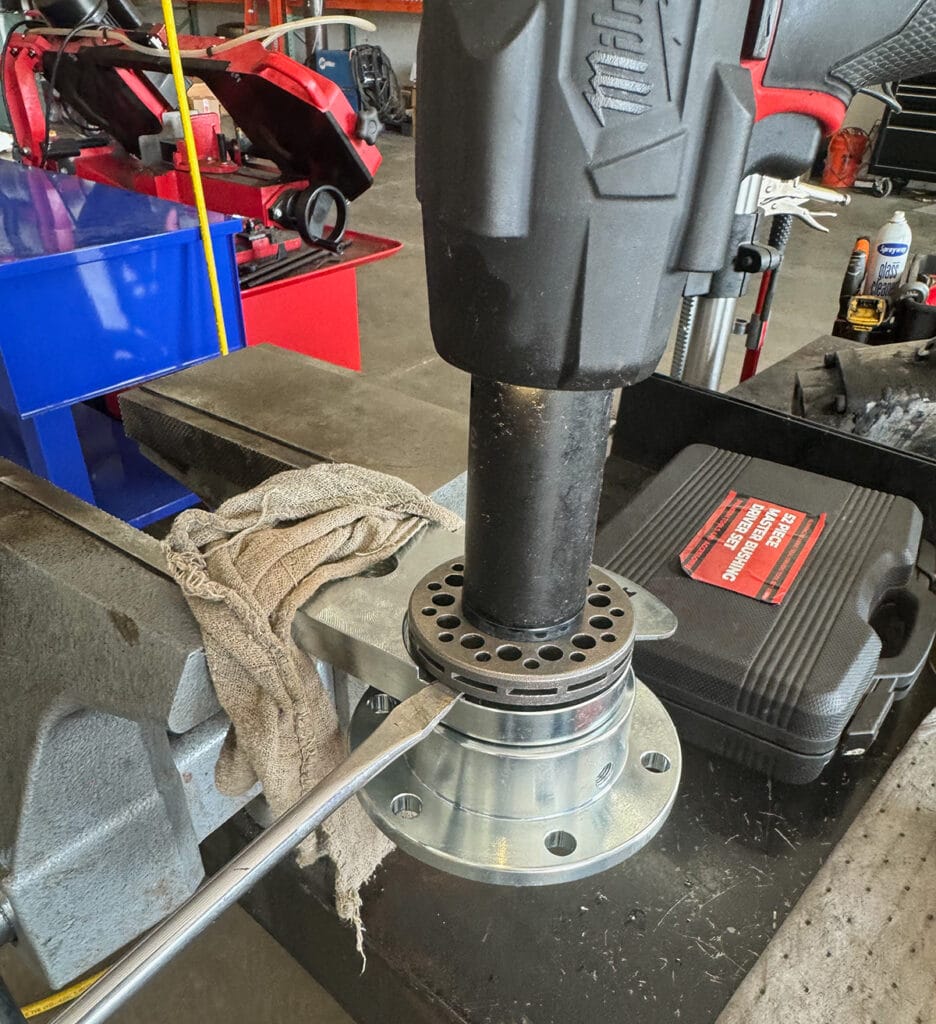
Thread on 30mm nut on end of shaft and tighten with impact wrench. You can use a filter strap on the shaft or wedge a flathead screwdriver against the sprocket to keep the shaft from turning.
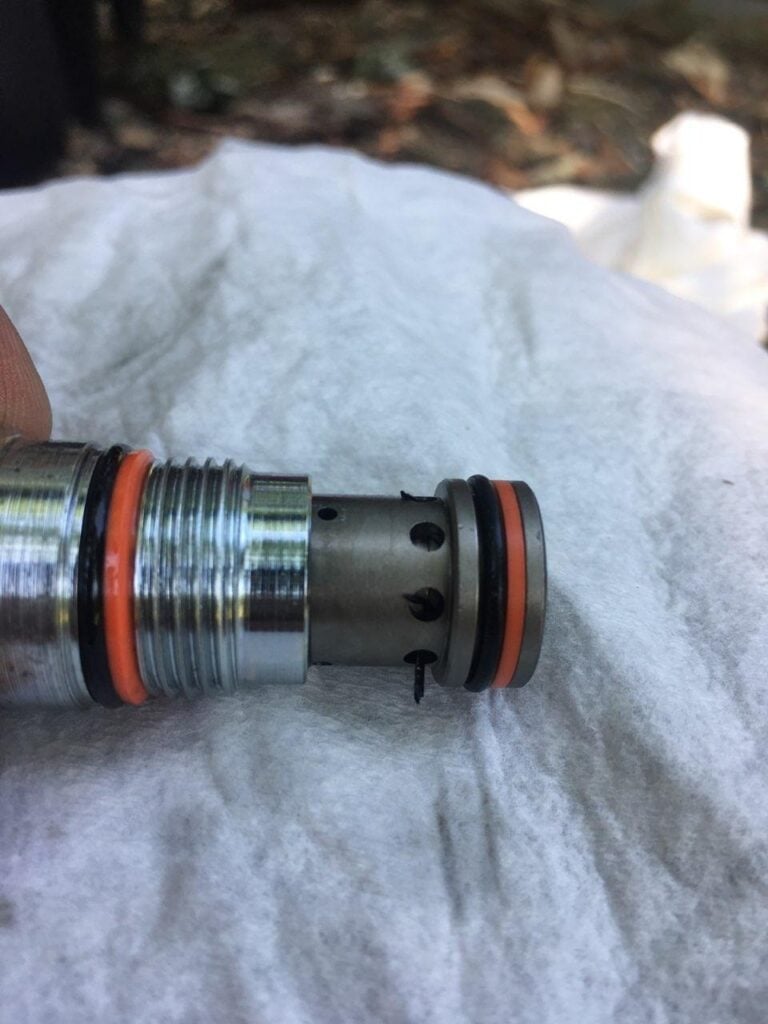
The nuts marked #2 are attached to the holding valve. Tighten them only by hand for now.
The holding valve is to be attached to the fitting, also this part is to be tightened only by hand for now.
Assemble the steel for for the holding valve, see picture below. Note that pipe has to be pushed through the fitting during assembly.
Tighten #3 securely to the cylinder.
Tighten the nuts A, B and C evenly by hand.
Tighten all parts using a wrench. Do it little by little, making sure all the parts stay in a straight line.
Changing the Electromagnetic(Vicker's) Valve
Remove the protective cover on the grapplesaw (17mm hex)
Remove the 4 plastic dust covers on the vickers valve
remove the four allen bolts on the vickers valve (4mm allen)
To Reduce the bar speed; turn the valve clockwise
To Increase the bar speed; turn the valve counter-clockwise.
After adjusting the knob, tighten the set screw.
After all four bolts are removed, lift up on vickers valve and turn over
There may be restrictor plugs in the ports. Take note of the location.
Place the allen bolt in the restrictor plug and pull straight up to remove.
Transfer the restrictor plug(s) to the new Vickers valve.
Lubricate the four bolts and install the new vickers valve in the grapplesaw. The bolts should be torqued to 5-7N-m (44-62lbf-in.)
Replacing the Saw Motor
Make sure no oil gets in contact with the drive belt.
Open the lid on the saw unit
Remove the bigger drive wheel by unscrewing the screws labeled #1.
Use one of the removed #1 screws and put it in the third hole #2 to press the wheel outward off the axle.
Repeat these steps for the smaller wheel.
Remove the saw bar mount assembly by unscrewing the 6 bolts holding it.
Before removing the saw motor, make detailed notes of how the hydraulic lines are connected to make it easier to re-install the new motor properly.
Remove the hydraulic lines, and then the saw motor (2 bolts)
Move the hydraulic block from the old saw motor to the new motor. It’s important that this be mounted in the same way as before, with the plugged hole facing the same direction as the axle.
Re-assemble the parts in the reverse order
When reassembling the parts, remember to put some oil (not Vaseline) between the drive wheel and the centerpiece.
Removing and Cleaning the Check Valves
Remove the protective cover to expose the valve set.
Locate the 4 check valves (see yellow arrows in pictures)
Using a 22mm wrench, go back and forth to loosen the cartridges. (The upper check valves differ from the lower ones)
Remove the cartridges and check for damaged seals and debris stuck in the valves. Remove any debris.
If seals are damaged, install new seals.
Re-install cartridges and hand tighten with wrench.


